
no knead bread – the ongoing saga
Updates:
October 2020 – moved post to pickledboar.com
April 2020 – an update to yeast options and making your own starter.
March 2020 – now includes an option for proofing using an InstantPot.
Bread. There’s a long history behind it, not just as a staple in our diets, but in our cultures. While there has been a number of shifts, especially it seems in recent years with people avoiding gluten more and more frequently, bread baking could be more popular now than it’s ever been. Many of those making it now seem to be mostly interested in quality over quantity. They’re not doing it to provide a dietary stable, but rather an indulgence.
This post, well, it’s long. So if you’re just here for the nitty gritty… you might actually be better off going elsewhere. The purpose of this post isn’t really to give you a recipe, it’s for me to document what I’ve learned through years of occasional bread making for myself. Since it is occasional, I need to keep notes so I remember what I did the last time, what worked, what didn’t. And since I have to keep those notes anyways, I figured I would share them with others, in case you want to take a bit of a shorter route here than I did.
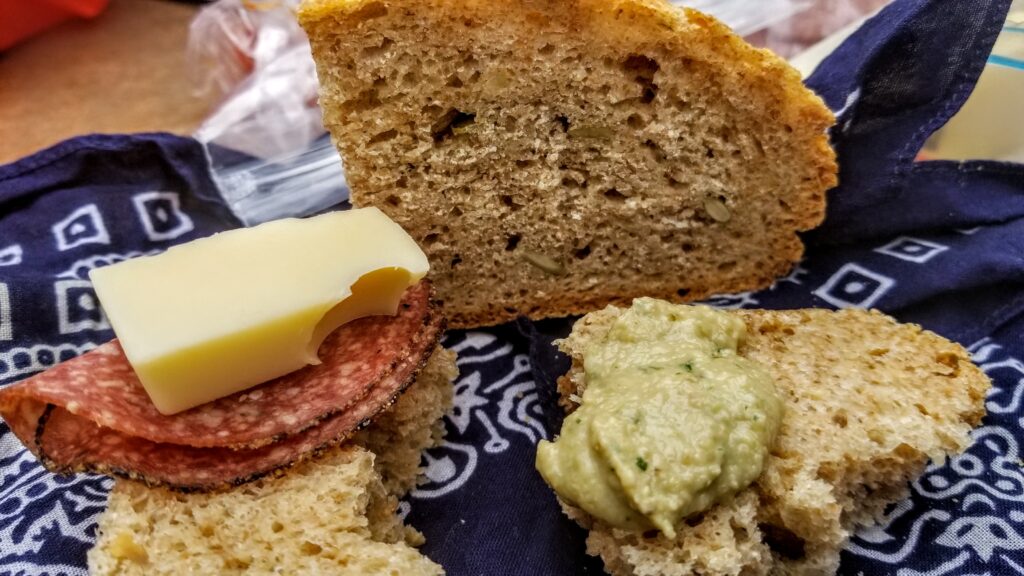
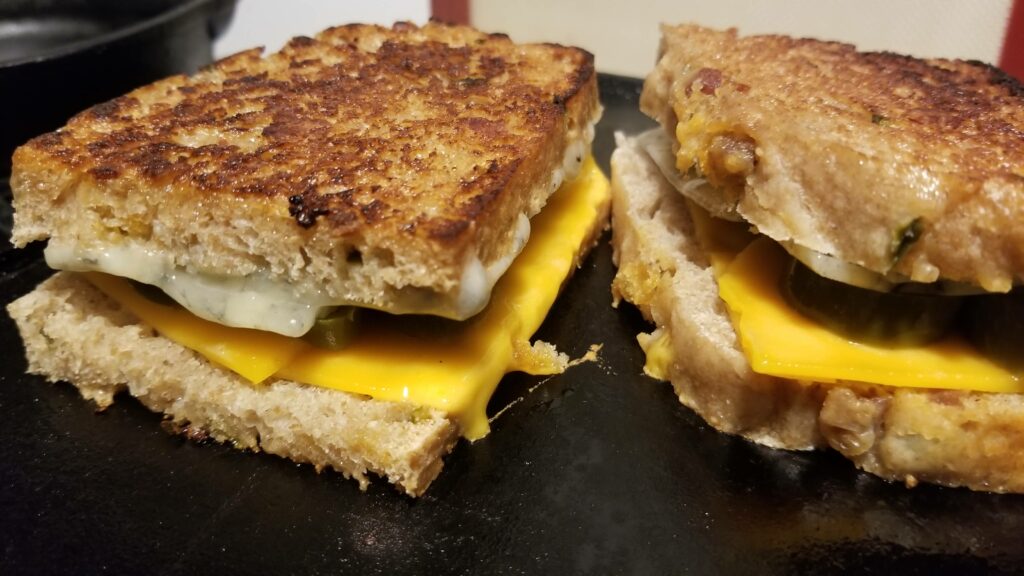
lunch while hiking; homemade bread with salami, cheese, and homemade jalapeno hummus
I have dabbled in breadmaking a few different times over the decades. It started out with using a bread machine to handle the initial mixing, kneading and rise, then I would form the loaf into the desired shape, give it another rise and bake. It was something I primarily did for holidays or special gatherings.
I got rid of my bread machine when I moved from MN and hadn’t replaced it… and instead, I’m using the rediscovery of “no-knead” bread-making, which some would argue is pretty much the original method of making bread. Ok, sure, it is likely the original versions were flatbreads, not the yeast breads that came later, but it’s still a very old method. While no-knead bread may take a long time to prep, nearly all of that is just waiting, actual work time is really just minutes, so it can be an easy way to have freshly baked bread with just a little bit of planning ahead.
With all bread, the time you let it rise is called proofing, and with no-knead bread, you let extended proofing time do all the heavy lifting… or kneading in this case. No-knead bread also seems to be a bit more forgiving when it comes to measurements and the process, which also means that every loaf will be slightly unique. Heck, you might even get away with calling it artisan if you really want to impress your friends.
For me, this also fits my overall cooking style, where I tend to use recipes as guidelines, not as a strict set of instructions. It’s often said that baking is a mix of science and art, and in many ways when it comes to cakes and cookies and such, it is maybe even more science than art. But with bread baking, and especially this no-knead method, it is much more forgiving and leans much more towards art. And this post will continue to evolve as I try new things, learn a different technique, or just discover something I think is worth sharing.
the basics…
Bread is a very simple thing. All you really need is flour and water. Of course, this most basic of bread really isn’t very good. Add a touch of salt, and while it remains flat in shape, the flavor increases quite a bit. Mix in some yeast and things rise, pun intended, to a whole new level. And really, that’s all you need to make some great tasting bread. But to make it even better, there are virtually an infinite number of things you can do. Mix up the grains in the flour, the liquid, add any of many different flavorings from sweet to savory, change up the shapes. There’s no limit.
The overall process is pretty simple. Mix up the dry ingredients and stir in the wet to form the dough. Wait. Shape the dough. Wait a little bit longer. Bake. Enjoy. Ok, sure there is a bit more to it than that, but it’s really not all that difficult.
There’s a LOT of great resources out there for those that want to really get deep into the process of bread making, the science behind it and more… I’m not going to that deep, but I will try to hit on a few of the more important things I’ve learned. I do have another blog post with a selection of resources I’ve used myself, if you want to check them out.
the flour…
Most recipes are going to ask for bread flour. Basically bread flour has a higher amount of gluten in it than your standard, all-purpose flour (about 14% gluten in bread flour versus 12% for regular flour). Gluten is what gives the bread dough it’s stretch and what traps the pockets of gas/air as it rises and bakes, giving the loaf it’s “crumb”. You can use just about any flour you have/want, but those with less gluten or whole-wheat flours will give you a heavier, denser, loaf. I like to use a mix, usually about 50/50, of white and wheat flours. One recent discovery I made recently is the use of vital wheat gluten. If you are using any flour other than a bread flour (which you can often get in white and wheat versions), you can add about 1 tablespoon of vital wheat gluten per cup of flour to help improve that crumb texture. Most recipes are going to call for 3 to 4 cups of flour, and it’s not really exact. You don’t need to worry about sifting, or even accurately measuring. The forgiving nature of no-knead bread means even if you’re off by 1/4 cup here or there, you should be fine.
the salt…
There is no need (another intended pun) to worry too much about the type of salt. Regular table salt is fine. Most recipes call for 1 to 2 teaspoons, which you can vary slightly depending on if you need to watch sodium intake, but I wouldn’t go down to less than half of what a recipe calls for. Salt, aside from improving the flavor of the bread by helping balance things out, it also improves the texture.
Salt helps temper the rising process allowing the gluten in the dough to strengthen and develop, giving you both a better crumb and a better crust. This can be especially important with no-knead breads and their extended proofing times.
I typically use either a slightly coarse sea salt, or a fine Himalayan salt because it’s what is in my kitchen. I would avoid kosher salt or other really coarse salts, which are great for topping them, but when it comes to cooking the large grain sizes will throw off your measuring and they may not absorb as evenly into your dough.
the yeast…
Yeast is what gives your dough its lift. Yeast is a living organism that eats the sugars in the flour and expels gas. The gluten in the flour traps that gas, stretches out, and that makes the various air pockets throughout the dough.
There are a few different types of yeast out there, but the two you’ll most readily find are active, dry yeast and instant (or bread maker) yeast. Most no-knead bread call for instant yeast because it doesn’t need “proofing”. Proofing, in this case, means mixing the yeast with warm water to activate it. I have almost exclusively used active dry yeast and never had issues. One thing I found that may make the difference is the temperature of your water. Instant yeast seems fine with using cool/cold water. I’ve always used warm water and active yeast, and I’ve never had any issues with my bread not rising.
Recipes calling for active dry yeast often mention starting your yeast by mixing some with water and sugar. I have never done so with any of my no-knead breads and have never had any issues. I believe this is because of the longer proofing time, it gives the yeast plenty of time to kick into gear.
One of the reasons I’ve always used active, dry yeast is that I was able to get it in the bulk area of my local grocery store. Because I don’t make THAT much bread, I could buy just a couple tablespoons at a time, and I store it in a small jar in the freezer to extend its shelf-life. If you buy a larger jar, store that in the freezer, or at least the fridge, and keep an eye on the expiration date.
April 2020 Update
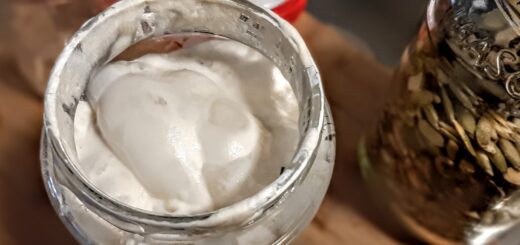
With the current state of things, many people have been taking up bread baking, but paradoxically, flour and yeast can be hard to find on store shelves right now. I lucked out and bought a jar shortly before things really hit, but I’ve also decided to try making a yeast starter. This is a topic worthy of it’s own post, so if you are short on yeast and want to stretch it out further, or just want to try something different, head over to the post on Yeast Starters: A No-Knead Bread Supplement.
I have also adjusted down the amount of yeast called for in the recipe from 1 tsp to 1/2 tsp. You may even be able to get by with as little as 1/4 tsp.
the water…
As I mentioned above, I use warm water because I use active, dry, yeast. And it helps “wake up” the yeast. It can’t be hot… which may kill the yeast. When I say warm, it just barely feels warm to the touch, barely over body temp. Most recipes call for about 1/2 cup of water for each cup of flour. This ratio is going to give what is almost a soupy like dough that is typical of no-knead bread. There’s a variation of this, often referred to as “almost no-knead” bread, which uses slightly less water and giving you a stiffer dough. This is for times you want to hand shape your dough into rolls, buns, flatbreads, etc. I doesn’t have to be a lot less, typically just reducing each cup of water by about 1 ounce. For the most part, tap water should be just fine. If you know you have particularly hard water, using bottled water could improve your bread a bit, and some folks do recommend filtering the water for consistency’s sake. And as you’ll see in some of the variations, you can sub other liquids for at least part of the water, such as beer or milk, and they’ll do different things to your taste and texture.
A lot of recipes and references call for using filtered or bottled water. The idea is that the chlorine in tap water can impact how the dough reacts. Honestly, I’ve never been worried about this, and I’m really not sure it has made any difference. I’ve never had bread not rise for me or such. If you’re concerned and do not have a filter, use bottled water or just fill a pitcher with water the night before and allow the chlorine to dissipate overnight before using it.
kitchen tools…
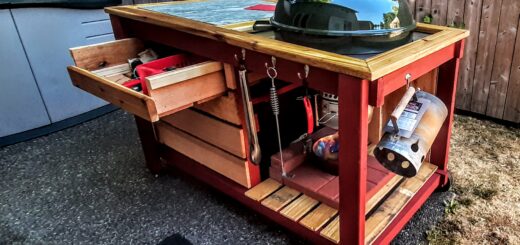
Most recipes out there call for using a Dutch oven (DO) for cooking your no-knead bread. The cast iron (enameled or not) DO is heated in the oven during the final proofing of the dough, and helps give it consistent heat and traps steam to help develop the crust. If you don’t have a DO, you can use any oven-safe pan… be they skillets, pie pans or regular loaf pans. I’ll be showing the process of using a DO, but the YouTube channel, Artisan Bread with Steve, has a number of videos to show you the tips to use with other pans, and I’ll add a bit more about it later when I get to that step of the process.
For mixing the dough, all you really need is a bowl, roughly the same size as your cooking vessel. I used to use a bowl, and I would cover that with plastic wrap to proof, I’ve since changed over to using my 2-quart Pyrex baking dish, and instead of having to use plastic wrap, I just use the lid. If you don’t have a Dutch oven, you could use one of these for baking the bread in too. I’ve seen a few recipes using these or other oven-safe, glass bowls for baking. You just need a separate one from the one you do your proofing in.
Other than that, you need some basic measure cups/spoons and something to stir with. I have a fairly stiff, rubber scraper that I use to help scrape around the edges of the baking dish as I mix things up… but some people use the handle of a wooden spoon, others even just use their hands. Wetting your hands with water can help prevent it from just sticking all over your hands if you go that route. Some clean flour sack type towels or other clean, lint-free towels are used during the second proofing of the dough to protect it as it sits out. I sometimes also use parchment paper. I line a bowl with it and put the dough in there for the second proofing, then I just lift it from that bowl to the DO when it is time to bake. This also makes it nice and easy to just lift out after it’s baked. Other times I’ve just dumped it from the bowl in to the DO and tip it out of the DO after it’s done.
You will find some folks that prefer to weigh their ingredients instead of measuring. In a lot of other baking, for the bulkier ingredients, I would agree this can be better. But by the very nature of no-knead dough, that amount of precision really isn’t needed. But feel free to use a recipe that uses weights if that is what you prefer.
making the dough…
Making the dough is quite easy. You mix some ingredients up, let it sit, stir the dough a little, let it sit and then bake. Ok, there is slightly more to it than that, I’ll give some additional tips to use as you go through the steps in the actual recipe.

When it comes to mixing the dough, I do it right in the Pyrex dish I use for proofing. First the flour, then salt, then yeast. Then I like to use a wire whisk to mix everything together. I typically use a 50-50 mix of white and wheat flour, so this really seems to help evenly distribute things. If you’re adding anything else to your bread, such as nuts, garlic, herbs, etc… do that now. Then you add your water, and while many recipes say to just use your hands… and you can… I use a rubber scraper. One with those spoon-shaped ends. It’s stiff enough to handle the dough, and I can scrape all the flour off the sides of the dish as I stir. Use what works for you.
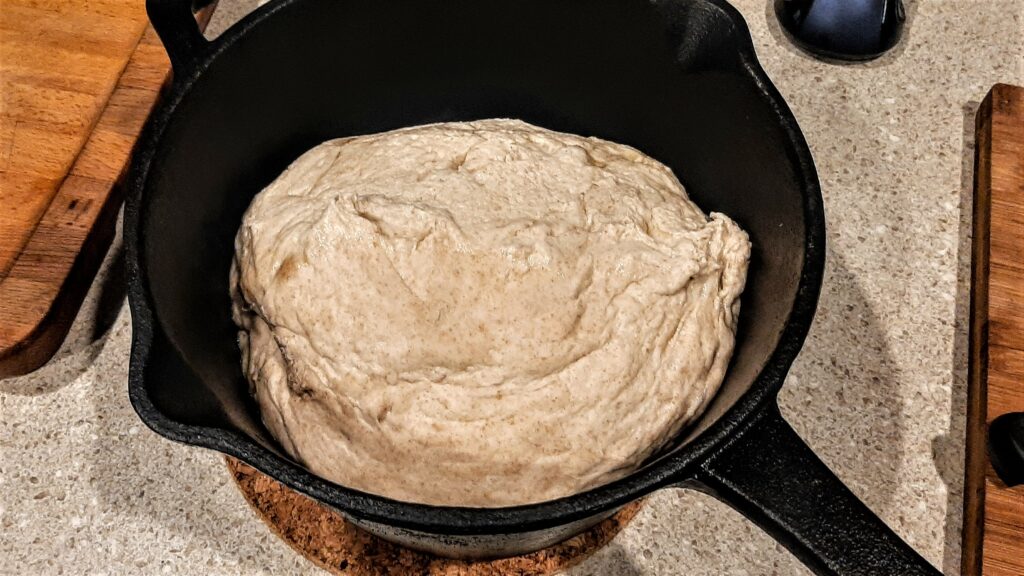
Next, I cover it with the lid from the dish. You can use plastic wrap, or if the dish you use has its own cover, use it. You want it fairly air-tight to keep the moisture in the bowl. Let this sit for at least 6 hours, but 12, even 18 or more is better. The dough should have at least doubled in size and will look, well, for lack of a better word to describe it, kind of wet and goopy.
March 2020 Update
I have also done a much quicker proofing cycle by using the Yogurt setting on my InstantPot. Either put the dough directly in your InstantPot pan, or use a smaller container that fits inside of it. Close the lid, push the Yogurt setting (normal heat) and set the timer for 4 hours. There’s no pressure, so once the timer goes off, just remove the lid and continue with the next step. There are some recipes out there that say you can also do this for as little as 30-60 minutes. I have not tried that yet, but I think next time I make pizza dough I will try doing so for 30 minutes and see what happens.
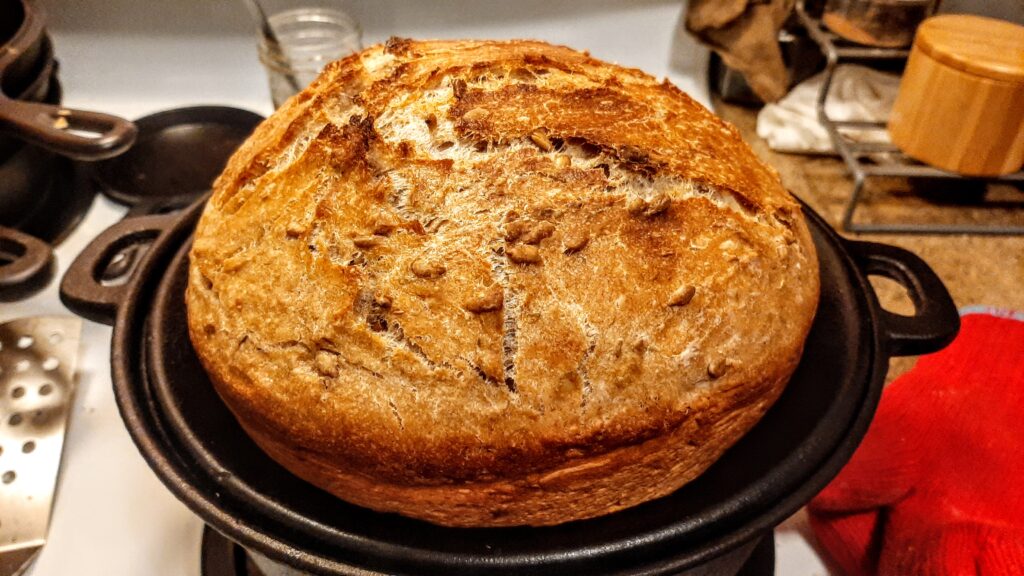
If you’re just doing a basic “boule” (the French word for ball, and what is often used to describe the type of loaf you cook in a Dutch Oven or similar vessel), then use the handle of your rubber scraper, or a wooden spoon to stir this goop into a ball. Adding a couple of tablespoons of flour across the top can help it come to better more. If you plan on shaping your dough for rolls or something else, or you just want some hands-on work, turn the dough on to a floured surface, work some of that flour into the dough and roll it around a bit. Spread it out and fold it over on itself a few times before. This is almost, but not quite what you would do if you were to knead the dough. If you’re still going to make a boule, just shape into a rough ball shape and put back in the bowl to continue rising.
However, if you want to make rolls, you can cut this dough ball in half, then each of those in half. From here you can cut each of the 4 balls into 3 and get 12 decent sized rolls. Roughly shape each into a ball and drop into the cups on a lightly greased muffin tin.
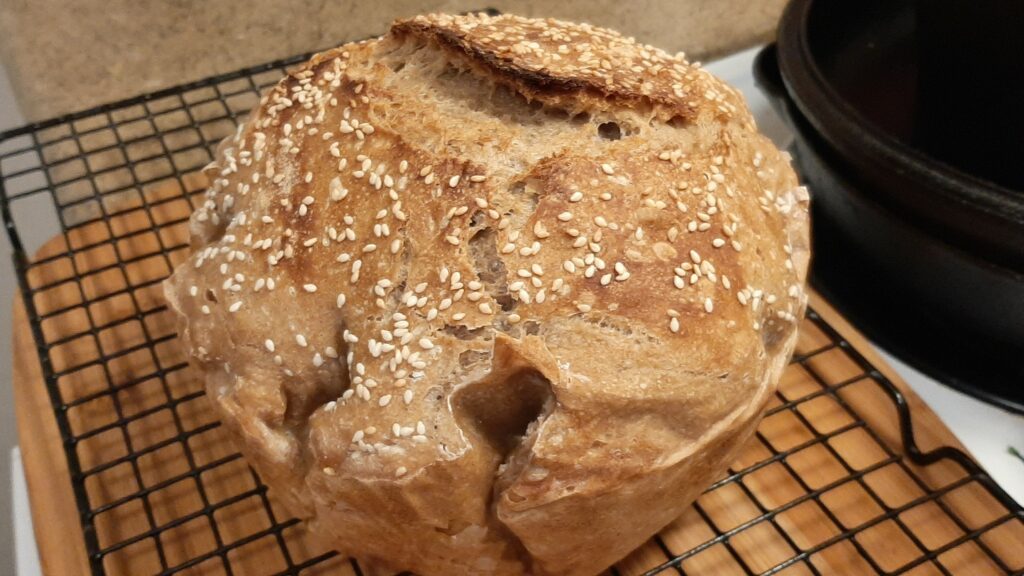
You could also choose to make other shapes, from more baton or Vienna shapes or even roll it out for pizza crust. If you want to top with sesame or other seeds, now would be the time to sprinkle those on.
After you’ve mixed and/or shaped your dough, cover it with a dry, lint-free, clean towel. Flour sack towels work great for this. Let it sit and do a second proofing for about two hours. But set a timer for an hour, when that goes off it is time to crank up the oven. Set it to 450°F, with a rack in the middle position, and set your baking vessel of choice in the oven as it heats. Then reset your timer for another hour.
If you’re using a covered pan, such as a Dutch Oven, leave the lid off. I’ve seen directions call for heating and not heating the lid, I prefer to not because then you’re not dealing with pulling off the hot lid when it comes time to add the dough to the pan. If you’re using an uncovered pan, such as a skillet or maybe a pie plate, also place an oven rack on the lowest spot, and put in a metal pan such as an 8×8 baking dish.
One thing I go back and forth on is using parchment paper. Basically I put a piece large enough to line my Dutch Oven in a bowl that’s slightly smaller than the DO itself, hand shape my dough into a ball and place that in the lined bowl. Really all this does is let me just lift the parchment out of the bowl and place in the Dutch Oven, which helps the final loaf keep its shape more than if I were to just roll it out of the bowl and into the pan. With the parchment, you get a more smooth top because the rounded top stays on top. Rolling the ball into the pan means the pinched underside ends up on top, giving a rougher look. I’ve done it both ways, and it’s really down to just a personal preference I think.
Once the timer goes off the second time, take the pan out of the oven and transfer your dough. If using parchment paper, it’s as easy as lifting it from the bowl. If you go with the rolling out of the bowl to the pan, just don’t let it do so from too high or the impact will knock out a lot of the air built up inside. You will lose some no matter what though.
There are those who like to slice the top of their loaves and some who don’t. there are some recipes that call for it, and many that never mention it. If you do not have a reallllly sharp knife to do this with, try a razor blade, or an even easier way to do it is with a good pair of kitchen shears. Just jab the points in and give a snip or three. I’ve heard that in the days of communal baking ovens, the slice pattern was used to help identify whose loaf it was. One of the reasons for really doing this is allow for some of the steam generated by the baking to escape without causing the dough to “bust out” of the top of the loaf. It sounds similar to how concrete workers put grooves in their concrete pads to control inevitable cracking.
Most of the breads I do I end up shaping a bit with folds on the underside as it does the final proof, which is then turned out into my Dutch Oven. These edges or folds are then on the top of the loaf and give those “control cracks” naturally and add to the rustic look of the loaves.
If using a covered dish, put the cover on and place in the oven. If not, place the pan in the oven and pour 2-3 cups of water into the metal plan you placed on the bottom rack, then close up the oven and set your timer for 40 minutes. By the way, make sure you use a “sheet metal” type pan if you’re doing the uncovered method, any other pan, including cast iron, could very well crack from thermal shock (rapid change in temp) when adding the water.
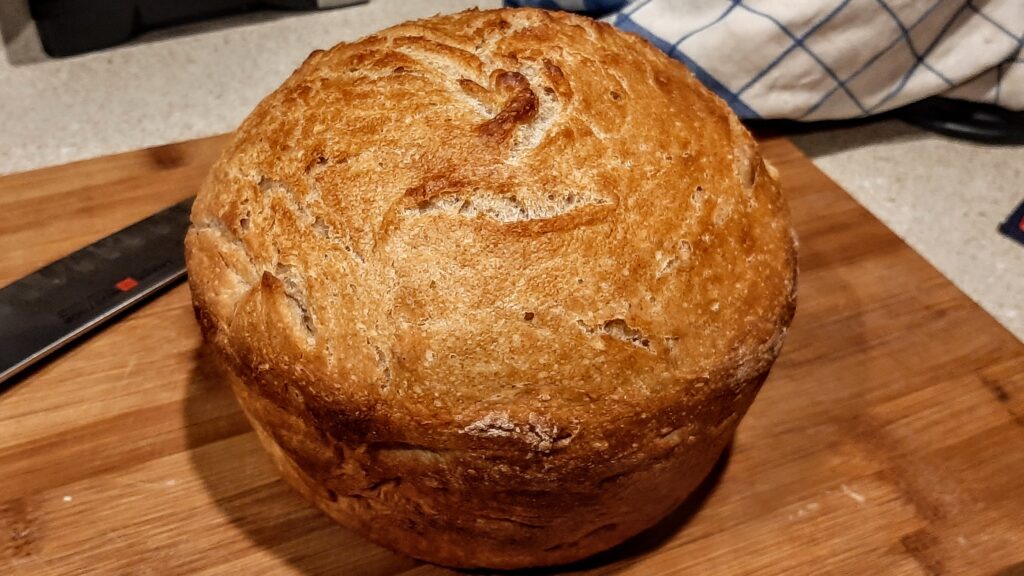
After the timer goes off, remove your lid (if using), and bake another 10-20 minutes. How long depends on how you want your crust. The longer you go, the thicker your crust will get. I was going to say crisper, and at first, it will be, but I also find that by the next day it will absorb enough moisture from the air as to lose it’s crispness a bit. It may take a few loaves for you to decide how you want your crust, and it may vary from loaf to loaf, I usually go about 8-10 minutes. If you have an instant read thermometer, your bread is done when it hits at least 190F, but it may also easily end up between 200-210F.
Once you decide it’s ready, remove from the oven, remove from the pan and let it sit. Preferably on a wire rack. Barring that, a clean towel. This is to help prevent condensation on the bottom of the loaf.
Now is one of the hardest steps. Wait. Yes, wait. At least 15 minutes before you slice into that loaf. Like a good cut of meat, you need to let things rest a bit before slicing into it. Waiting longer can be even better, but the only time I manage to do that is if I’m baking a loaf to take somewhere, and it would look tacky with a chunk of it missing off the end.
A good, serrated, bread knife will work wonders for slicing your bread without squishing it, or just go rustic and rip it apart by hand. Serve with lots of butter, or maybe some good olive oil for dipping, or… well, I’m sure you have your favorite.
Let me know how yours turns out. What great seasoning/flavor combo did you come up with? How did you use that dough, other than just a loaf? Leave comments or reach out to me directly. And above all, enjoy!
no knead bread
ingredients
4 cups flour (bread or all-purpose)
1/2 tsp active dry or instant yeast
2 tsp salt
2 cups water room temp/warm
directions
- Add all the dry ingredients to a big bowl. Use a wire whisk or your hand to get the ingredients evenly distributed. (I use my Pyrex casserole dish).
- Add room temperature water/liquid. Stir everything together with your hands or spatula/rubber scraper.
- Cover this with plastic wrap or some other tight cover and let it sit in a room temperature spot for about 4-18 hours.
- Use the handle of a wooden spoon or similar utensil to push down the dough, then stir it into a ball in the bowl. If the dough is still very wet, you may need to sprinkle a bit of flour on the dough to help it form. Alternatively: Scrape the dough out of the bowl and onto a well floured surface. Flatten the dough out with your hands into a rough a square and then fold it over itself a few times, than tuck the ends under forming a loose ball.
- Clean the bowl/dish just used, line with parchment paper and lay this ball, seam side down, into the bowl. Top with seeds, etc. if desired at this point.
- Loosely cover this with a dry, clean, lint-free towel.
- After about 60 minutes, put the Dutch Oven, without lid, in oven and turn on to 450°F. Let heat for 60 minutes.
- Lift parchment paper, if using, from bowl and set in Dutch Oven. If not using parchment paper, turn dough from bowl into Dutch Oven. Slice/cut the top as desired.
- Cover with lid and bake for 40 minutes, remove lid and bake for an additional 10-20 minutes.
- Remove from oven, remove from Dutch Oven and let sit for at least 15 minutes before slicing
- Additional Notes
- You can add 3/4-1 cup of whatever add-ins you would like to mix in. Keep the volume on the lower end if your add-ins are particularly wet or greasy (pat everything as dry as possible), keeping all bits 1/4-inch or smaller.
- Try things such as seeds, nuts, chopped garlic, chopped pepperoni or salami, peppers, cheese, chopped olives, dried fruits, etc. Add items to dry ingredients and stir to coat before adding liquid.
- If you are not using bread flour, try adding 1 tbsp. of vital wheat gluten per cup of flour, or in particular if you are using a whole wheat flour and/or dense add-ins. It will help with the rise and crust of those breads.
- Try substituting 12 oz of beer for the same amount of the water, or add up to 2/3 cup of powdered milk (or use milk instead of water) to the dry ingredients.
- If you are not using a Dutch Oven or other covered container, put a metal pan with at least 2 inch walls (an 8×8 baking pan works well) on the bottom rack of the oven while heating your baking pan. Just before putting the dough in the oven pour approximately 3 cups of water in the metal pan. This will provide steam, similar to when baking in a covered container.
- A cast-iron skillet, pie pans, ceramic dishes or even standard loaf pans work well using this method.

1 Response
[…] a loaf of No-Knead Bread. Make any kind you want, even a seasoned loaf. For my starter, I did make what I think was my […]